Wednesday, September 10, 2014

Pumpkin Waffles


Pumpkin season is in full effect in my household... I literally have about 15 plus pumpkin recipes in my queue ready to be made!


My husband is over it already. He tagged me in this picture the other day:


He said he was married to the Bubba Gump of pumpkin... I sir, am honored. Pumpkin all the things!
Especially when you can add it to breakfast food because then, my kids are totally eating vegetables for breakfast? Amiright?

For the Waffles:
2 cups all purpose flour
3 Tablespoons packed light brown sugar
2 teaspoons baking powder
1 teaspoon baking soda
1 heaping teaspoon pumpkin pie spice
1/2 teaspoon salt
1 1/2 cups of milk (I used whole)
1 heaping cup of pumpkin puree (some extra might have accidentally fell into the bowl)
1 egg yolk plus 3 egg whites
4 Tablespoons melted unsalted butter, cooled
2 Tablespoons apple cider vinegar

Warm Maple Syrup
Cinnamon Cream Cheese Butter for topping

In the bowl of your stand mixer fitted with the whisk attachment, whip together the 3 egg whites until stiff peaks form, about 3-5 minutes. Set aside.
Combine the flour, brown sugar, baking powder/soda, pie spice, and salt in a large bowl. 
In a separate bowl, whisk together the milk, pumpkin puree, egg yolk, butter, and apple cider vinegar until blended. 
Add pumpkin mixture into the dry ingredients just until incorporated. Gently fold in the whipped egg whites.
Heat a waffle iron and scoop batter, about 1/2-3/4 cup at a time, on to the hot iron. Cook according to manufacturers instructions and serve immediately.

Tips for waffles: 
Cool on a rack to maintain crispness
Reheat in oven at 250 for 5 minutes if necessary.

Serve with maple syrup, powdered sugar, cinnamon butter, or plain! My kids loved these waffles and I hope y'all do too! Enjoy!


*recipe adapted from Number 2 Pencil

Saturday, September 6, 2014

Pizza Pull Apart Bread


This pizza bread is the bomb y'all! It combines soft pillowy bread with all of the flavors of a pizza; cheese, pepperoni, and sauce... Yum!

This pizza bread is the perfect appetizer or meal and is great served with dipping sauces like ranch or a garlic butter.

Trust me, you need to make this for your Football weekend!

For the Bread:
2 3/4 cups all-purpose flour
2 teaspoons sugar
1 teaspoon salt
2 1/4 teaspoons (or one packet) active dry yeast
1/3 cup whole milk
6 Tablespoons unsalted butter
1/4 cup water
2 large eggs, room temp

For the Topping;
1/2 cup pizza sauce
1 cup shredded mozzarella cheese
1/4 cup sliced pepperoni
2 Tablespoons unsalted butter, melted
2 garlic cloves, minced


  1. In the bowl of your stand mixer, whisk together TWO cups of the flour, sugar, salt, and yeast. Set aside.
  2. In a small saucepan, combine the milk, 6 Tablespoons butter, and heat over medium-low until the butter is melted and small bubbles start to form. Remove from heat and stir in the water, cool the mixture to 125 degrees.
  3. Pour the milk/butter mixture into the stand mixer with the flour/yeast and attach your dough hook. Mix on low speed until fully incorporated, about 3-4 minutes. Add in the eggs, one at a time, kneading in between each addition until the eggs are fully incorporated. 
  4. Add in a 1/2 cup of the all-purpose flour, kneading on low speed until the dough is smooth, about 2 minutes. Add another 1/4 cup of flour and mix until the dough comes together but is still soft and sticky. 
  5. Lightly flour a work surface and place dough on top. Knead 5-6 times just until the dough forms a smooth ball. 
  6. Lightly grease a bowl with vegetable oil, coating all sides of the dough, and stash in a warm, dry place, for one hour or until doubled in size. 
  7. Gently punch down the dough and turn on to yet another lightly floured work surface. Roll out to a rectangle that is approximately 20" by 11", trim the edges as necessary to make the rectangle. Brush the rectangle with the sauce, sprinkle with the mozzarella cheese, and top evenly with the pepperoni.


Cut the rectangle (width wise) into 5 equal strips. Cut each strip into 4 smaller squares, there should be 20 total, and stack them on top of one another.


Grease a 9x5" loaf pan and place the stacked squares in the center, leaving a little room on either side.


Cover with plastic wrap and allow it to proof for 30 minutes or until doubled in size.


Preheat oven to 350 degrees and bake the proofed bread for 15 minutes. While the bread is baking, combine the garlic and melted butter. When the time is up, brush the top of the bread with the butter-garlic mixture and place back in the oven to bake for another 15 minutes or until golden.

Remove the bread and allow it cool for 10-15 minutes before serving. Pull apart and enjoy!


*recipe adapted from justataste.com

Sunday, August 31, 2014

Cereal Milk Popsicles


I asked my kids to explain the flavor of these Popsicles after they tried them... I asked: "what do they taste like?" My almost 5 year old responded "cereal" and my 3 1/2 year old said "like milk, mommy"...

I swear I don't pay them for advertising... But that is exactly what these Popsicles taste like. It's the sweet and creamy last sip after you've finished your frosted flakes...


The Momofuku milk bar cookbook changed my way of thinking... They are famous for their wild concoctions and although some may be skeptic to try these, once you do your mind (and life) will be changed forever. I knew these Popsicles would be a hit with the kids and adult  crowd and is the perfect end of Summer treat. Sweet, creamy, and slightly crunchy. You can mix in the cereal of your choice but I figured Fruity Pebbles would give it a fun "pop" of color!


You will need:
(makes 6-8 large Popsicles or 12 mini Popsicles)
2 cups Frosted Flakes cereal
1 cup heavy cream
2 cups whole milk
1/4 cup sweetened condensed milk
2 Tablespoons granulated sugar
1/8 teaspoon salt
1/2 cup Fruity Pebbles cereal


  1. Line a baking sheet with parchment paper and place your Frosted Flakes cereal in a single layer over the top. Preheat oven to 300 degrees and bake the cereal until slightly golden and fragrant, 12-14 minutes. Remove from the oven and allow the cereal to cool slightly. 
  2. In a large bowl, combine the toasted cereal with the heavy cream and whole milk, mix gently to combine and allow it to sit for 20-25 minutes. 
  3. Now, place a fine mesh sieve over a large bowl and pour the "cereal milk" through it, catching all of the now mushy cereal. Toss the cereal as it has done its job (or eat it, if mushy cereal is your thing)...
  4. Add in the sweetened condensed milk, sugar, and salt. Pour the mixture into a small saucepan and heat over low just until the sugar has dissolved. Pour the mixture back into the bowl and store in your refrigerator for 1-2 hours until it has cooled completely. 
  5. Take out your Popsicle molds and fill the bottoms (technically the tops) with about 1-2 Tablespoons of Fruity Pebbles cereal. Pour the Popsicle base into the molds to the top, the cereal should now have floated upwards. If using a different heavier cereal you may choose to layer the cereal and cream mixture into the molds. 
  6. Place in the freezer until completely frozen, 6 hours or overnight. 
  7. Warm the molds and gently remove the Popsicles!

Enjoy this sweet, creamy treat!


Monday, August 25, 2014

The Best Pumpkin Bread with Cinnamon Cream Cheese Butter


My first pumpkin recipe of the season and it was knocked out of the park! This moist pumpkin bread is the perfect breakfast or dessert treat and when it's smeared with the cream cheese butter it is out of this world good!


I sprinkled my loaf with crunchy pepitas for that extra pumpkin kick. The bread itself is spicy and so moist... It would be great with walnuts throughout or even a layer of cream cheese, if that is your thing. Let's get to baking, shall we?

For the Bread:
(makes 2- 9x5" loaves)
1 cup unsalted butter, at room temp
2 cups granulated sugar
4 large eggs
3 cups all purpose flour
2 teaspoons baking soda
2 teaspoons pumpkin pie spice
1/2 teaspoon cinnamon
2 teaspoons salt
2 cups pumpkin puree (not pie filling)
1 cup sour cream
2 teaspoons vanilla

1/4 cup Pepitas for topping (optional)

For the Cinnamon Butter:
1 stick (8-ounces) cream cheese, softened
1/2 cup unsalted butter, softened
1 cup powdered sugar
1 teaspoon vanilla
3/4 teaspoon cinnamon

Start by making the bread:
Preheat oven to 350 degrees and prepare the loaf pans with parchment paper, cooking spray, and flour coating. Set aside.
In the bowl of your stand mixer fitted with a paddle attachment, cream together the butter and sugar until light and fluffy, scraping the sides as you go.
Add eggs, one at a time, until incorporated.
In a separate bowl, whisk together the flour, baking soda, pumpkin pie spice, cinnamon, and salt. Add to the butter/sugar mixture and mix on medium just until combined.
Add in the pumpkin, sour cream, and vanilla. Mix to combine.
Pour batter evenly amongst the 2 prepared pans, sprinkle with pepitas if using, and bake in preheated oven for 50-55 minutes or until a toothpick inserted in the center comes out clean. Do not over cook or the cake will be less moist*.
Allow the bread to cool in the pan for 20 minutes before inverting and allowing to cool completely. Wrap tightly with plastic wrap to store and slice and serve when the craving strikes.

For the butter:
Mix all of the ingredients together with a hand mixer until smooth and creamy. Spread over the pumpkin bread in a thick layer and enjoy!
It's a slice of Fall...


*recipe adapted from FreutCake

Friday, August 22, 2014

Caramel Apple Pie Bars


Autumn recipes have exploded in the blog world... And while I am all for an influx of pumpkin, I don't want to overwhelm you or my family. So what's also well known for being a Fall staple? Apples of course.

And do you know what happens when you mix apples with butter, crumb topping, cinnamon, and caramel... Lot's of caramel?

Perfection. Oh, and Caramel Apple Pie Bars.

For the Shortbread Crust:
1/2 cup unsalted butter, melted
1/4 cup granulated sugar
1 teaspoon vanilla
1/4 teaspoon salt
1 cup all-purpose flour

Apple Pie Filling:
2-3 apples, peeled and thinly sliced
2 Tablespoons flour
2 Tablespoons granulated sugar
1 teaspoon cinnamon
1/8 teaspoon ground nutmeg

Streusel Topping:
3/4 cup old fashioned oats
1/2 cup light brown sugar
1/2 teaspoon cinnamon
1/3 cup all-purpose flour
6 Tablespoons cold butter,  cubed

Caramel for drizzling

Preheat oven to 300 degrees and line a 9" square baking dish with foil, spray lightly, and set aside.
In a medium bowl, mix together all of the ingredients for the crust until a dough forms. Spread evenly into the bottom of the prepared pan, poke with a fork all over, and bake in the preheated oven for 15 minutes. Meanwhile, start on your apples...

In a large bowl, mix together all of the ingredients for the apple pie filling and set aside.
In another bowl, mix together the oats, sugar, cinnamon, and flour for the streusel. Cut in the cold butter until a crumble is formed, set aside.

Once the crust is finished, bump up the temperature of the oven to 350 degrees. Top the crust evenly with apples. Reorganizing so they all fit. Sprinkle the crumble over the top and bake for 25-35 minutes or until the top has browned and the apples are soft.

Cool on your counter top for 30-40 minutes and then allow the bars to continue to cool completely in the fridge.
Once the bars are ready, slice and serve. Drizzle each bar with a friendly helping of caramel and enjoy! It's a bite sized, square piece of Fall, y'all!


*Recipe adapted from Sally's Baking Addiction

Saturday, August 16, 2014

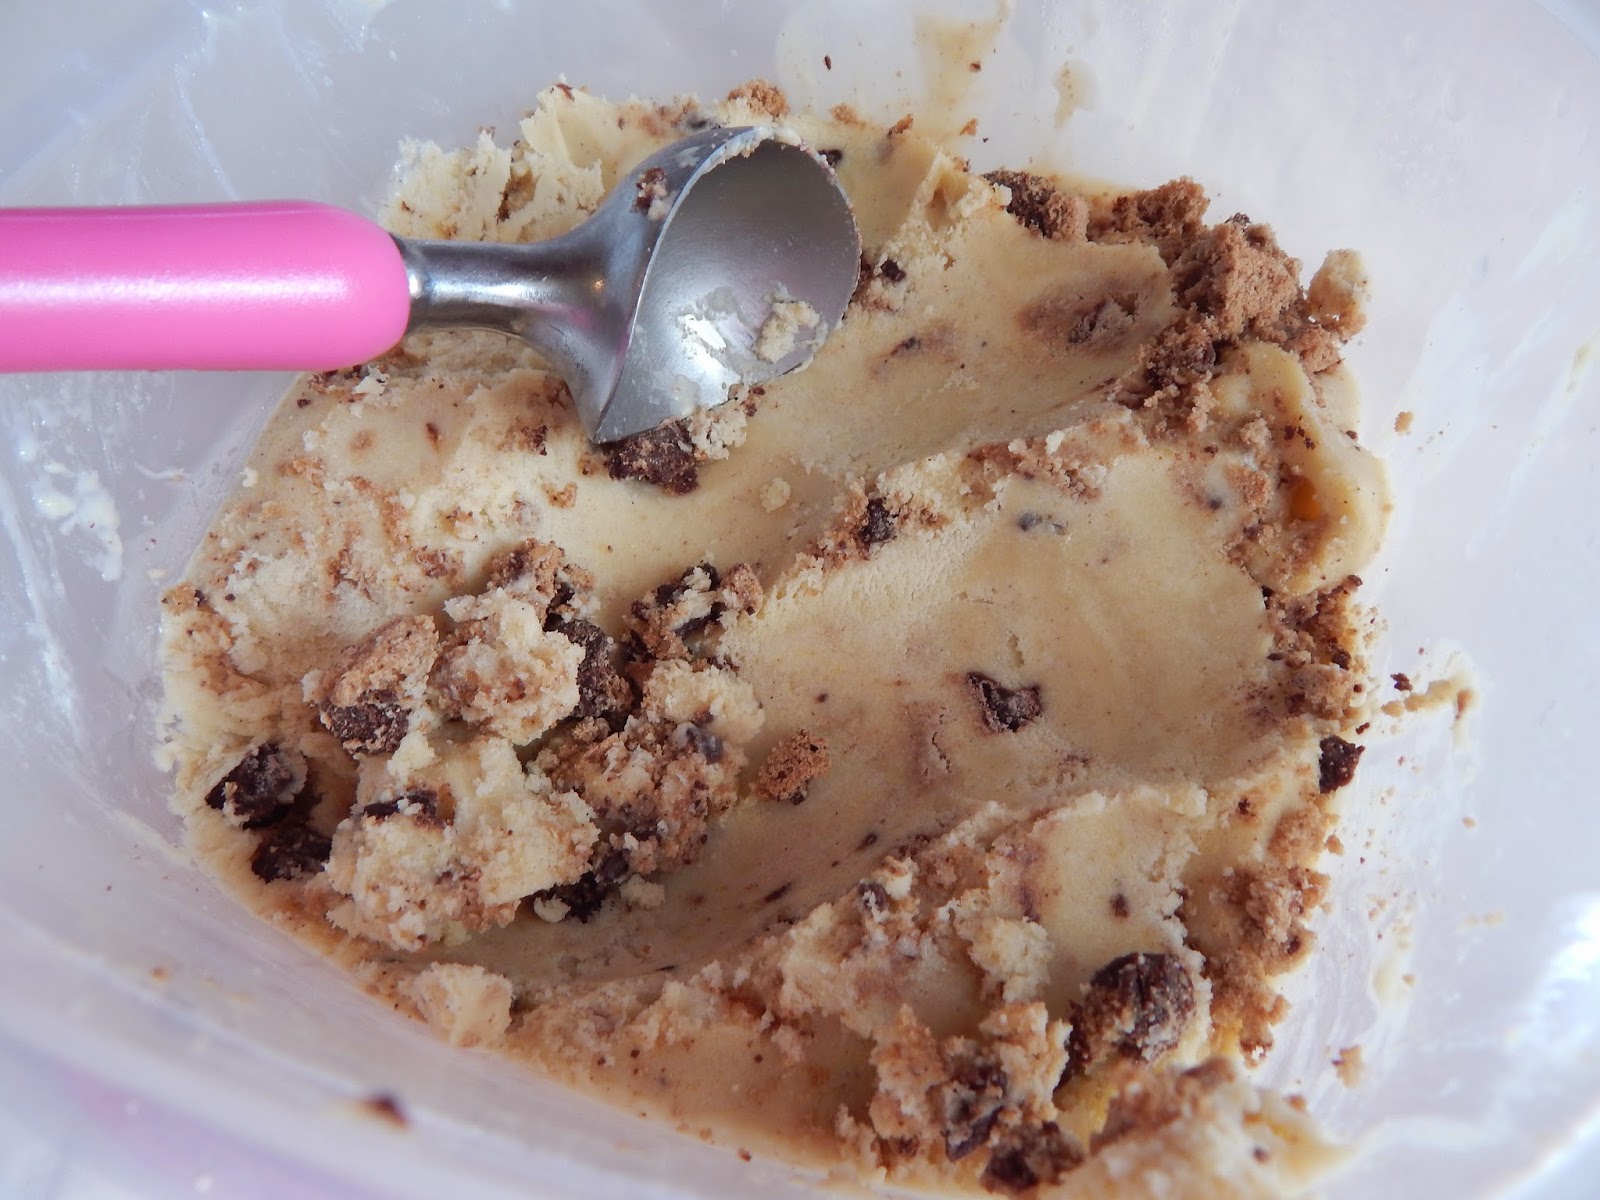
Chocolate Chip Cookies and Cream Pumpkin Ice Cream


Can I just take a moment to share how uber excited I am that the Pumpkin Spice Latte from Starbucks is set for an early release!? Ermahgerd... Pumpkin!

I thought I would jump start the pumpkin season, while it's still warm out, with a spin on pumpkin ice cream. Not that I am opposed to ice cream in the dead of winter but it does taste a little better when it's 90 out. 

This ice cream is a fantastic mix of pumpkin base with chunks of dark chocolate chip cookies... Delicious!

I will take suggestions for a shorter name... :)


For the Ice Cream:
1 cup heavy cream
3/4 cup pumpkin puree (I used homemade)
3/4 cup sugar
3/4 teaspoon pumpkin pie spice
2 teaspoons vanilla
pinch of salt
3 egg yolks
1 cup whole milk
1 cup half and half

3-4  dark chocolate chip cookies, chopped

In a medium saucepan, whisk together the heavy cream, pumpkin puree, sugar, pumpkin pie spice, vanilla, and pinch of salt. Mix on medium speed until starting to steam but not bubble, remove from heat.
In a medium bowl, whisk together the egg yolks, milk, and half and half until combined. 
Pour 1/4 cup of the warm cream/pumpkin mixture into the egg and milk mixture while whisking to temper. Pour the egg and milk mixture into the pumpkin mixture and mix, on medium-low speed, until thickened and it coats the back of a spoon.
Pour mixture into a heat proof container and cool completely in the refrigerator, preferably overnight. 

Churn ice cream according to manufacturers instructions on your ice cream maker. When finished, mix in chopped cookie pieces, reserving 1/4 cup.
Place in an airtight container, sprinkle with remaining cookies, and place in the freezer to freeze completely.

Scoop and serve!

I love the combination of the spicy pumpkin base and dark chocolate, crunchy cookies. Enjoy this taste of Fall on a cone!


Wednesday, August 13, 2014

Cheddar Fish Crackers


I don't know about y'all, but full blown panic mode usually starts to kick in once I know school season is around the corner. My son has officially 5 days until he starts half day Preschool while my other son will stay in day care. That may not sound like a lot to you, but when I have to figure out half days of transportation and lunches that he will eat and won't cause him to protest food all day... It gives me anxiety.

That's why these little babies make the perfect snack for him. They are toddler hand sized, made with homemade ingredients, and top the charts in the cheese-y and flake-y categories.

The most difficult aspect of this recipe is cutting them all out. This dough should yield about 3-4 cups of crackers. Also, don't hesitate to change up the different cheeses. Mine probably aren't as orange as you all may be familiar with because I mixed my cheddar cheese with Monterey Jack.. So good.

Plus, making your own fishy cookie cutter is easy!


I simply sliced a 1/4 inch round off of a soda can, cut off the extra length, and shaped it into a one inch fish, taping the ends where the tail is at. My body is a little longer so you could technically call them whales but who's judging, right?

Here's how to make the dough...

For the "Fish" dough:
1 cup all purpose flour
3 Tablespoons cold butter, cubed
1 Tablespoon vegetable shortening
4 ounces sharp cheddar cheese, shredded
4 ounces Monterey Jack cheese, shredded
3/4 teaspoon salt
Dash of ground black pepper
2-3 Tablespoons cold water

Alright, in the bowl of your stand mixer fitted with the paddle attachment, mix together the first 6 ingredients (everything but the water). You will want to beat the mixture until it resembles a fine sand.


With the mixer on low, slowly drizzle in the water, starting with 2 Tablespoons. You are looking for the mixture to start to come together and form a dough ball. Form the dough into a ball, wrap with plastic wrap and store in your refrigerator for 15-20 minutes.

Preheat oven to 350 degrees. After dough has cooled, roll out on a lightly floured surface to 1/4" thickness. Cut out fish shapes and place on a parchment lined cookie sheet.


Bake for 15 minutes or until golden. Remove from oven, cool slightly, and enjoy!

These crackers puff up a fair amount in the oven creating the perfect crunchy outside and soft center. Enjoy!