Sunday, April 29, 2012

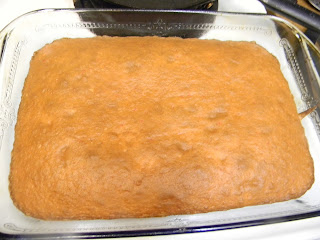
Warm Apple Crisp


Ever since I was young, Fall time was my favorite time of year.

Then, specifically it was Halloween, now that I am an adult there's nothing I love more than taking my kids to pick apples, watch the leaves change, go to pumpkin patches, and watch the gleam in their eye when someone hands them FREE candy.

It's magical...

It's funny, but food often transports those memories. This dish makes the house smell like a crisp fall day plus my kids LOVE it... I am fairly sure they had more than we did.

It truly is easy to whip up, and the combination of warm apples with slow melting vanilla ice cream can't be beat.

Make this tonight!

Filling:
1/3 cup packed light brown sugar
4 tsp all-purpose flour
1/2 tsp ground cinnamon
4 large green apples (Granny Smith), peeled, cored and cut into 3/8-inch slices
1 Tbsp fresh orange juice
1 Tbsp unsalted butter, cold and cut into pieces

Topping:
1/3 cup EACH coarsely chopped walnuts, rolled oats and packed light brown sugar
1/4 cup all-purpose flour
1/4 tsp ground cinnamon
3 Tbsp butter, cold, cut into pieces

Vanilla Ice Cream
Whipped Cream
Caramel Topping


  1. Heat your oven to 350 degrees and coat an 8" square baking dish with cooking spray.
  2. In a bowl, mix sugar, flour and cinnamon. Add apples and orange juice; toss to coat. Mound filling in prepared baking dish and dot with butter pieces.
  3. Bake for 25 minutes. Remove and let cool while you make the topping.
  4. Increase oven temperature to 375 degrees.
  5. In a bowl, toss walnuts, oats, sugar, flour and cinnamon. Add butter and combine with fingers until the topping is evenly moistened and crumbly. 
  6. Sprinkle the topping evenly over the par-cooked apples, pressing down lightly. Return to the oven and bake for another 25 minutes or until the topping is crisp and browned and the filling is bubbly.
  7. Cool on a wire wrack just until warm. 
  8. Spoon into serving bowls. Top with ice cream, whipped cream and a drizzle of caramel topping. 


Thursday, April 26, 2012

"Watermelon" Cake Pops

*Get ready for the messiest blog you have ever seen in your life....*


Am I the only one who feels like I get a confidence boost when I am on Pinterest?

Everything I come across in the food and drink section makes me think "pfff I can make that no problem!"

Here lays the problem... I can't. 

I'm usually pretty confident in the kitchen, but if I was Superman... Cake Pops would be my kryptonite. 

Bakerella, I commend you. Compared to her, Superman turns into Captain Underpants. 

How she has the patience to not only make these things but decorate the heck out of them? I will never know...

My sister in-law who is ALSO amazing in the kitchen (check her out!) even called cake pops "the assholes of baking". Yes....Yes they are.

But....  I felt like I had to share my journey with all of you. 

Because if anything, this venture taught me a lesson: In life and in the kitchen, not everything goes your way.

Lessons are so overrated..... Its more like if it doesn't work the first time, throw your pops across the kitchen, down a glass of wine.......

.....then go back and clean it all up..... 

I'll include the ingredients for you because maybe you are all little Bakerellas and can make these look amazing....

You'll Need:
Box of Strawberry cake mix...cooked and cooled (according to box)
1 tub cream cheese frosting
mini chocolate chips
white candy melts
green candy melts
lollipop sticks

....and your sanity

Once your 13x9 cake has cooled, crumble with hands into a large bowl. Mix in 3/4 of the tub of cream cheese frosting until all the crumbs are coated and sticky. Mix in about 1/2 the bag of mini chocolate chips...these will act as the "watermelon" seeds. 


With clean hands, take the cake and roll into about 2 tablespoon sized balls. Place on a greased cookie sheet and let set in the fridge for 15-30 minutes.

Once set, roll again if need be and melt some of your white candy melts. Dip one end of you lollipop sticks into the melted candy and then into the cake balls (this will act as your glue). Place back in the fridge to let this harden up.... another 20 minutes.


Melt your green candy melts. First you will want to dip the pops into the white this will act as the "inner" watermelon rind.


Once the white is set dip into the green.


Let it set and wrap. These were going to my sons schools bake sale (how embarrassing) so I only made enough white AND green ones to supply to them. 

Thus... My pictures have only the green. 

Shockingly they do taste great. So hopefully everyone can look passed these misshapen babies and pay at least a quarter for them!


They do look kind of cute all wrapped up....

Tuesday, April 24, 2012

Homemade Reese's Minis


I have this notion that when things are smaller they don't count for as many calories.


For instance, eating 4 mini donuts isn't as bad for you as a whole one.


Or eating sliders isn't nearly as bad as a whole giant burger.


Who cares if I eat 5 little Reese's cups? My brain says "hey, but look how SMALL they are!"


OK, so my logic might be a little jaded, but I know I'm not the only person who thinks this way....


Plus, I've been on a candy making rampage lately. 


My thoughts are filled with Kit Kat's, Snickers, Twix Brownies and Reese's...


And if I can 100% control what goes into these things they definitely can't be as bad for you.


So here they are.... Reese's at your fingertips. Larger cups could be just as easy using normal cupcake sized liners.


Reese's:
(makes about 24 cups)
1-16 oz jar Natural Peanut Butter
1 1/2 cups powdered sugar
4 tablespoons butter, melted
1 package good quality milk chocolate chips 
mini cupcake liners
Cooking Spray


Place the 1 1/2 cups of powdered sugar into a large bowl and add in the peanut butter. Stir carefully to slightly incorporate the powdered sugar. Stir in around 2 tablespoons of the melted butter. Set aside.


Melt your chocolate. You can use either a double broiler or the microwave here. You will want to stir often until the chocolate is smooth and completely melted. 


Arrange your cupcake liners onto a baking sheet and lightly coat with the cooking spray. 


Spoon the melted chocolate into the cupcake liners, coat the bottom and push up the sides about half way. Use your fingers to "coax" the chocolate up the sides. Set the extra chocolate aside.


Once all of the papers are coated place your tray in the fridge until the chocolate sets up, about 10 minutes. 


Add the remaining 2 tablespoons of melted butter to your peanut butter mixture and mix until smooth. 


Pipe the peanut butter or use a spoon to place a little dollop into each cup. 
(obviously I like a good amount of PB in mine)

When all of the cups are filled, wet your finger and then press down on each glob of filling to flatten slightly. Spoon the remaining chocolate over the top, pushing to the sides using your finger. When all are topped place back in the refrigerator for another 30 minutes to set up completely. 


These are FANTASTIC! Since I've always been a fan of the chocolate-peanut butter combo I love being able to control how much peanut butter went in the center. The chocolate melts in your mouth and the peanut butter gives you that "cheek-tickling" sensation. 
They are fairly easy to whip up so make them today!!!! I ended up with some extra peanut butter filling so I think I see homemade Nutter Butters in my future.. stay tuned!!


Monday, April 23, 2012

Bubblegum Ice Cream


Blue bubble gum ice cream was IT for me when I was a kid.

Rainbow sherbet? No thanks. You can have your Rocky Road... Bubble gum ice cream topped the charts. And not just any one, the blue kind. 

Which apparently manufacturers thought was in short supply because they hoarded that stuff. I knew of one location when I was younger and I would beg my parents to take me. Unfortunately, it was a good hour away.

But you know when you are alone and you're like:
"mom, lets get donuts" and she says... 
"no! eat your carrots" 
"for breakfast?" 
"don't ask questions!!"

But if your friends are over she's like... 

"Of course honey, what kind!?" psh... 

I eventually became privy to that game so when my cousin was here I knew she'd never say no!

To this day my cousin and my favorite ice cream is still blue bubble gum. And when I was pregnant with my second son the craving struck.... I wish I could say I was motivated enough at 7 months to make homemade ice cream but I won't lie to all of you. I was lucky enough to find it at our local grocery store here and it was fantastic.

This will sound funny tho. I was never keen on those HUGE gumballs sitting there all frozen in my ice cream. I avoid anything that stands in my way of NOT having to chew. I did love picking them all out and setting them aside and then when everyone was done with their ice cream treat, I still had mine! Muahahaha....

So for my ice cream recipe I found these awesome little gum "nuggets" that wont hurt if you swallow them (and I refuse to believe they sit in my stomach for 7 years...)

*WARNING: The bubblegum base may cause sticking to your pan, I experienced this with my own. As this is bubblegum, please don't use your favorite pan! Also, nonstick helps!*

Ice Cream Base:
2 1/2 cups half and half
1 1/2 cups heavy cream
3/4 cup sugar
2 egg yolks
1 teaspoon vanilla extract
1/4 teaspoon salt
Blue or red extract, depending what color you want
12 pieces Dubble Bubble
Gumballs, nuggets, Chiclets.... the options are endless!


  1. In a saucepan over medium heat, whisk together all of the ingredients up to the Dubble Bubble. Make sure everything is combined and starting to warm through. 
  2. Add in the pieces of bubble gum and bring to a light boil. Whisk until the gum is practically melted and the base has started to thicken. 
  3. Remove from heat and place in a sturdy container. Cover and place in the fridge until completely cold. A minimum of 6 hours but I think overnight is best. 
  4. You might notice a lot of the gum particles have sunken to the bottom but using a fine mesh strainer pour the base through to remove any remaining.
  5. Pour your base into an ice cream maker and churn for a good 30 minutes. If you are adding in smaller pieces of gum, pour in during the last 10 minutes of churning. Otherwise if using the bigger gum balls combine with the ice cream once churning process is finished. 
  6. For a "soft serve" feel eat once it's finished otherwise, I like to freeze mine for a good 2 hours more. 


I realize you're all thinking "What difference in flavor does the food coloring make?" "Why would pink taste any different than blue?"

It wouldn't.... OK!? But there's nothing more satisfactory than a blue ring around your mouth! SO it's still my favorite.

The base has a full bubble gum flavor so gum balls aren't even necessary! Enjoy this today!

(By the way... The first 6 ingredients make a great base for any flavor of ice cream. The options are endless!)


*notice happy blue ring around mouth!!*

Tuesday, April 17, 2012

Butter Crackers (aka: Ritz)


I had full intentions of JUST calling these Ritz crackers until someone managed to run off with my wavy cookie cutter... I am fairly sure it was the kitchen gnomes. Anyways...


I am a cracker fiend!


My family being from Wisconsin often meant my meal of choice was Kaukana spreadable cheese, summer sausage and of course... Ritz crackers.


It's a mystery that I haven't died from a heart attack yet, I'm just saying...


I wish I could take 100% credit for this creativity but alas.. I found it on Pinterest and its from cupcakeproject.com.


Check out her site, it's awesome. She devoted quite some time to perfecting these beauts...


Ritz Crackers:
2 cups all purpose flour
3 tsp baking powder
1 tbsp sugar
1/2 teaspoon salt
6 tbsp cold butter + 3 tbsp melted butter
2 tbsp vegetable oil
2/3 cup cold water


Preheat your oven to 400 degrees.
Place the flour, baking powder, sugar and salt into your food processor and pulse to combine.
Add the cold butter, cut into pats and pulse until crumbly.
Add the vegetable oil, all at once and pulls until dough starts to become sticky.
With the processor on, slowly pour in the water. The dough should form a ball once finished.


Roll out the dough as thin as you can get it, it's OK if they are different sizes they are homemade after all.
Use your ruffly cookie cutter (classic Ritz shape) or really any shape you like will do. Poke holes in the top of the Ritz to allow for even baking.


Brush a light coat of butter onto the crackers and sprinkle lightly with salt before baking.


Bake for 12 minutes or until your desired brownness is achieved.


Brush with more melted butter (and a sprinkle of salt if you like) immediately out of oven. Cool and enjoy!


These aren't as crisp as typical Ritz but definitely flaky. They are easy to whip up and are best with a topping like I don't know.... Cheese and Summer sausage? ;) Enjoy your week everyone!!


Sunday, April 15, 2012

Twix Brownies


It's simple.


Basically, I like my brownies like I like my men.


Sweet, rich, layers of complexities and rich....Did I mention rich?


So when I thought of the idea for Twix Brownies I knew they would be a winner.


And I wouldn't have to eat a salad on the first date or nod my head  to pretend like I'm listening.


Twix Brownies would just "get me".


Oh and get me they did... twice. 


Anyways, please make these amazing rich brownies. All it takes is a simple short bread recipe and a boxed brownie mix.


Also, check out my best friend's Homemade Twix over at Crafts, Cakes and Cats... They look amazing!


 Short Bread Layer:
1 cup (2 sticks) butter, at room temp
1 cup confectioners sugar
2 teaspoons Vanilla
2 cups all-purpose flour


Favorite Box of Fudge Brownie Mix


Caramel Layer:
1 bag caramels unwrapped
2 tablespoons whole milk


Chocolate topping:
1/2 bag semi-sweet chocolate chips plus 1/2 bag dark chocolate chunks
2 tablespoons butter
1/4 cup whole milk


For the shortbread, preheat your oven to 300 degrees. Line a 9x13" pan with parchment paper then spray to grease. Set aside.
In your stand mixer, beat together the butter, sugar and vanilla. Add the flour and continue to beat until mixture comes together. Take the dough and using your hands, press evenly into the pan. Prick the crust all over with a fork to allow even baking.
Bake the crust until pale, around 20-25 minutes.  Take out the pan and cool slightly.


Make the brownie mix, following the back of the box. Increase the oven temperature to what is specified on the back of the box. Pour brownie batter over shortbread and bake for necessary amount specified or until a toothpick inserted comes out clean. Let your brownies and short bread cool completely. 


Once cooled, place caramels and milk in a saucepan. Cook over medium low heat until caramel is melted. Pour over the brownies, making sure to work quickly and spread evenly.Allow to cool on counter or if short on time cool in fridge for 15 minutes covered with plastic wrap. 


During this time start on the chocolate layer. Place all of the ingredients in a sauce pan and stir over low heat until completely melted, smooth and glossy. This should take 5-10 minutes. Remove brownies from fridge and pour chocolate over the caramel layer. Cover with plastic wrap and cool completely in the fridge until the top layer is firm.


Allow brownies to come to room temperature and cut. Enjoy by itself, warmed with ice cream on top or snuggled up in a blanket watching Ryan Gosling. I tend to go with the latter. 


Happy Sunday Everyone!!

Tuesday, April 10, 2012

Homemade Pop-Tarts


Husbands are funny.


And not even in a little kid "laugh-because-they-don't-know-better" kind of way.


Because they DO know better...


They're like adult children or something.


My husband and I got into a fight this afternoon on baseball and what counts as "an out". 


I'm sorry my religion isn't sports and I don't pray to the football God's every season.


Actually I kind of do (Go Packers!) But that's irrelevant...


He gets frustrated with me so I give up. If you're such a "genius" when it comes to sports, shouldn't you be able to explain it all?


I mean, what are you going to do when our kids are older and they ask about soccer and why that forsaken sport is 10 hours long!?


Anyways, my man-child husband inspired to me to make one of my childhood favorites: pop tarts.


These are a little time consuming but anything worth having is worth some effort.


Like marriage...


You are welcome to use your favorite pie dough... This is mine.


Tart Dough:
(makes 8-10 tarts)
2 1/2 cups all-purpose flour
1 teaspoon salt
2 stick, or one cup, butter. Cut into pieces and chilled.
1/4 cup ice water, plus extra if needed


Filling:
1/4 cup brown sugar
1 teaspoon ground cinnamon
2 teaspoons all-purpose flour
or:
Your Favorite jam or Nutella...
Plus 1 egg, whisked for brushing


In the bowl of your food processor, pulse together the flour and salt. Once combined, add in the chilled butter and pulse until pea-sized crumbs form (with a small amount of larger pieces mixed in). This will take 10-15 seconds of pulsing. 


With the machine running, start with a 1/4 cup of ice water, and pour slowly (in a steady stream) through the tube of the processor. I always need around 2 tablespoons more following. You want your dough to come together but not be too wet. Test by squeezing a small amount of dough together. If it sticks and is not too crumbly you are all set.


Divide your dough into 2 equal portions and form each into a flattened disk and cover with plastic wrap. Place in the refrigerator for a minimum of 1 hour or up to overnight.


If you have chilled your dough overnight, make sure to let it sit on the counter for 15-30 minutes before using.


Place a piece of your dough on to a lightly floured surface and roll into a rectangle that is around 1/8" thick. You will want your rectangle large enough to trim to 9x12". Cut your rectangle in half horizontally (at the 4.5" mark) then vertically every 3 inches. Making 8-4.5x3" squares.


Carefully transfer 4 (bottom tarts) onto your baking sheet. Taking the whisked egg, lightly brush the tops (of the bottoms. HA!) 


Combine your ingredients if making the brown sugar filling, or if using jam, take 1 tablespoon of either and spread onto the bottom tart. Leaving around a 1/2" edge. Grab another rectangle and place on top, pushing down lightly to seal the edges. Press the tines of a fork around the edges of the rectangle and repeat. 
Half of the dough should provide you with 4 full tarts. 
Brush the tops of the tarts lightly with the egg was and place in the refrigerator for 30 minutes.


Preheat the oven to 350 degrees and bake the tarts for 20-25 minutes until they are golden. Cool completely on a wire rack.


For the Glaze:
(if you like)
Combine 1/2 cup powdered sugar, 1/2 tablespoon of milk and 1/2 teaspoon of cinnamon in a small bowl and stir to combine. Adjust the milk to more or less depending on your desired consistency.


Allow the tarts to cool before glazing. 


Now enjoy... the options are endless and even the strawberry would be great with a vanilla glaze and sprinkles. I like mine just plain.